OC-DECLARE Guide
This guide shows how OCPQ can be used to discover, model, and analyze declarative process constraints using the OC-DECLARE language. For more details on the OC-DECLARE approach itself, please refer to the OC-DECLARE paper here (Springer) or here (Personal Website).
Start
To go to the OC-DECLARE view, click on the OC-DECLARE button on the right 1. In the OC-DECLARE view, you can create and manage OC-DECLARE models. To add a new model, click on the add button on the top left 2.

Functionality Overview
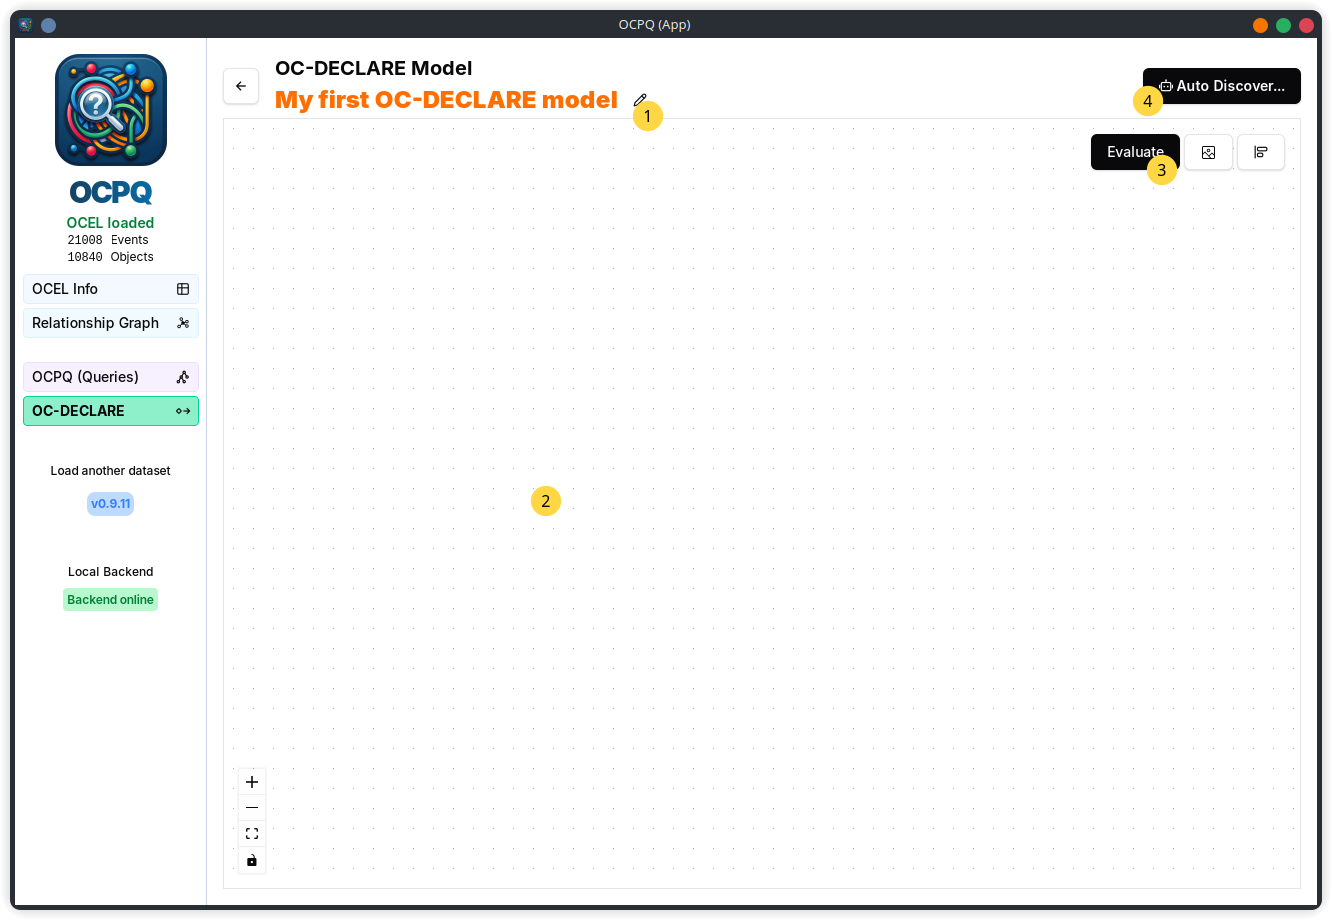
Once a OC-DECLARE model view is opened, you can access the following functionality:
- 1 On the top left, you can edit the name of the model. This name is shown on the overview page.
- 2 In the main area, you can view and edit the model. Initially, no nodes or constraints are present.
- 3 On the top right of the main area, you can find a button to evaluate constraint conformance.
- 4 Finally, on the very top right, you can automatically discover constraints from the loaded OCEL using the discovery button.
Modeling Constraints Manually
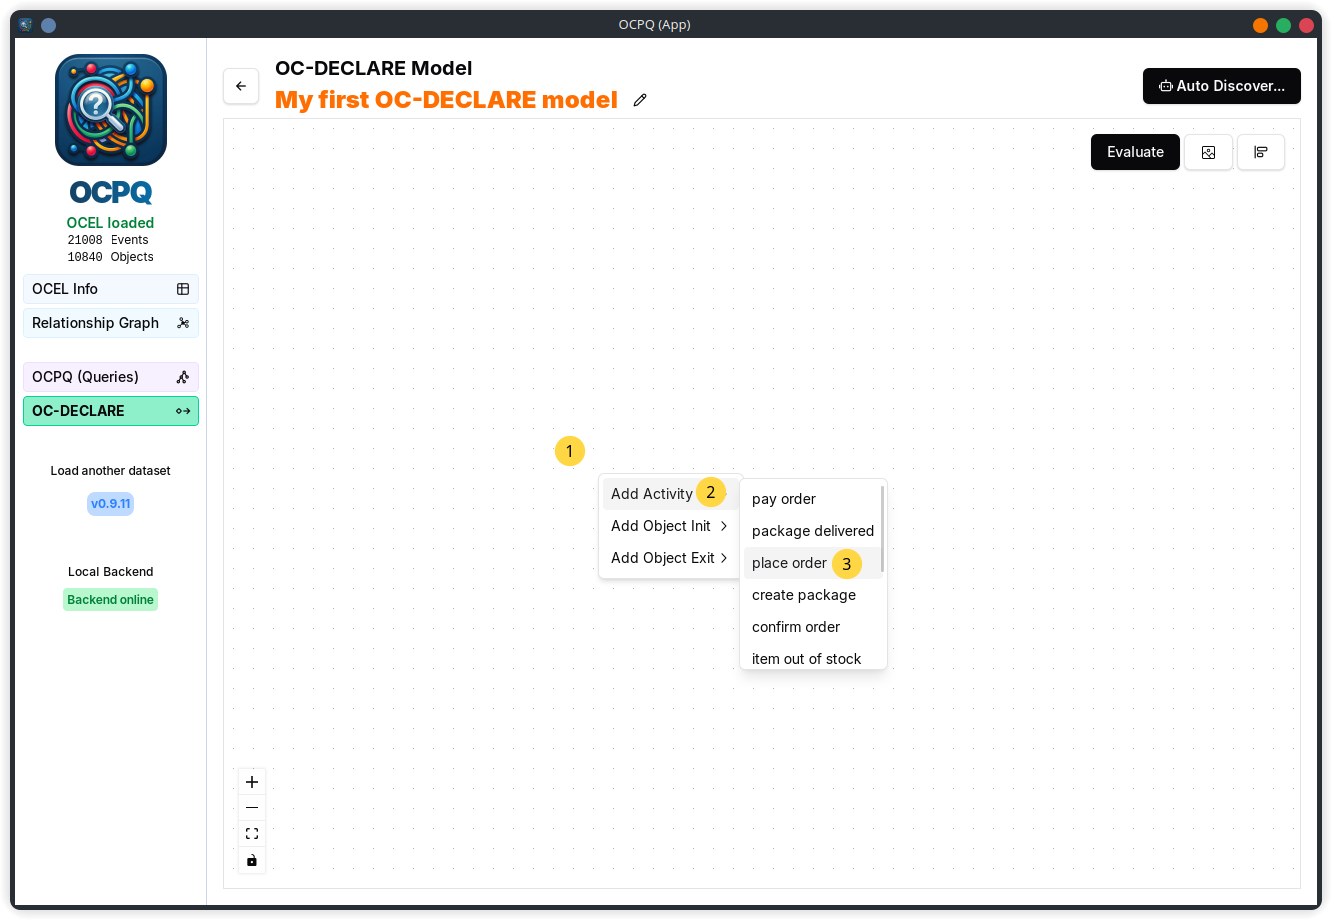
You can add nodes by right-clicking in the main area 1 and selecting the type of node you want to add 2. For each type, the possible options are shown in a submenu 3.
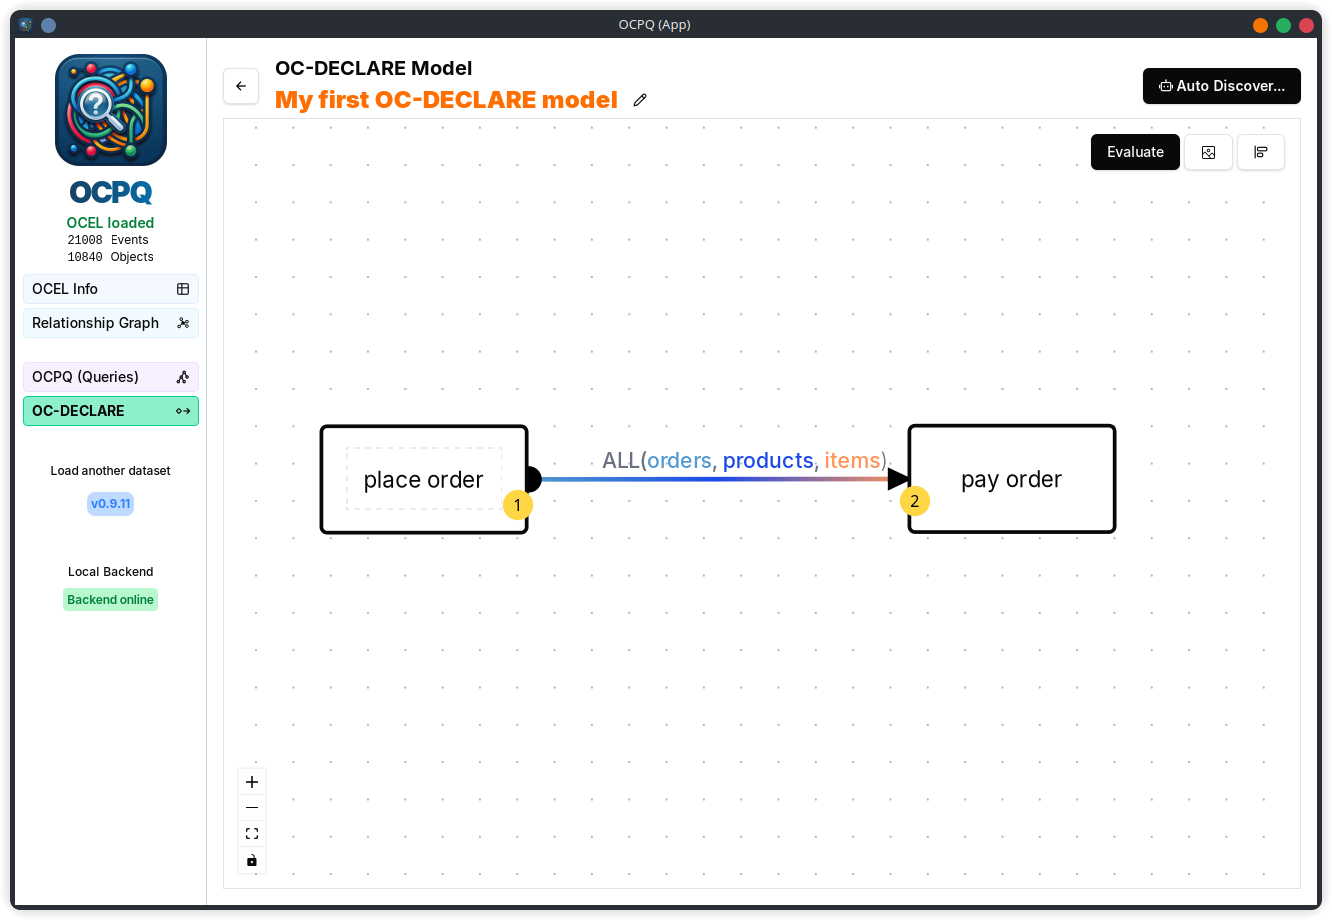
Once at least two nodes are present, you can add constraints between them by dragging from the outer section (marked with a dashed border) of one node 1 to another node 2. By default, a maximal object involvement based on the object types involved in the two nodes is created.
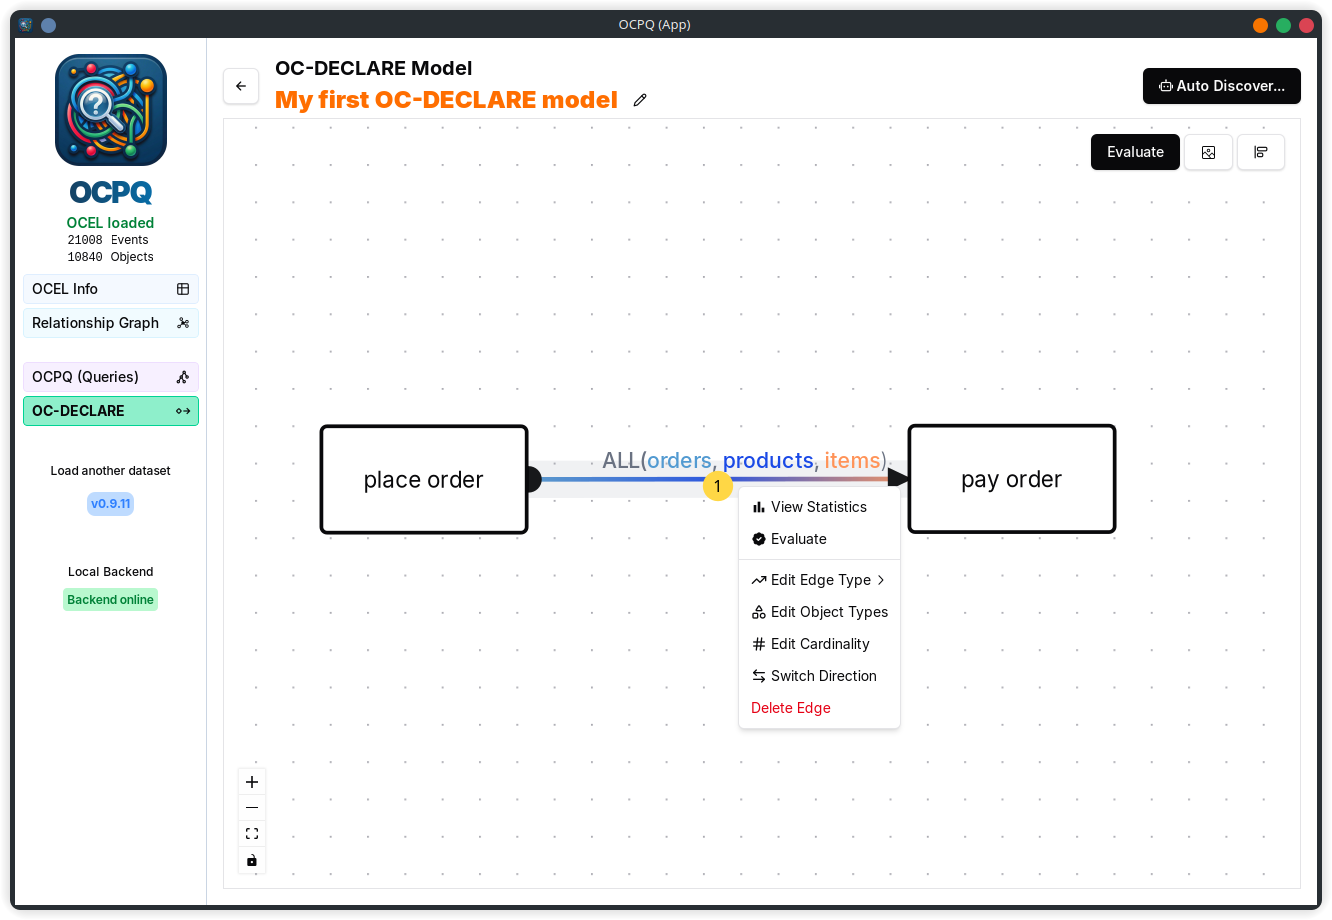
The object involvement, as well as the minimal and maximal count can be adjusted by right-clicking on the constraint edge 1 and selecting the appropriate edit operation from the context menu.
Automatically Discovering Constraints
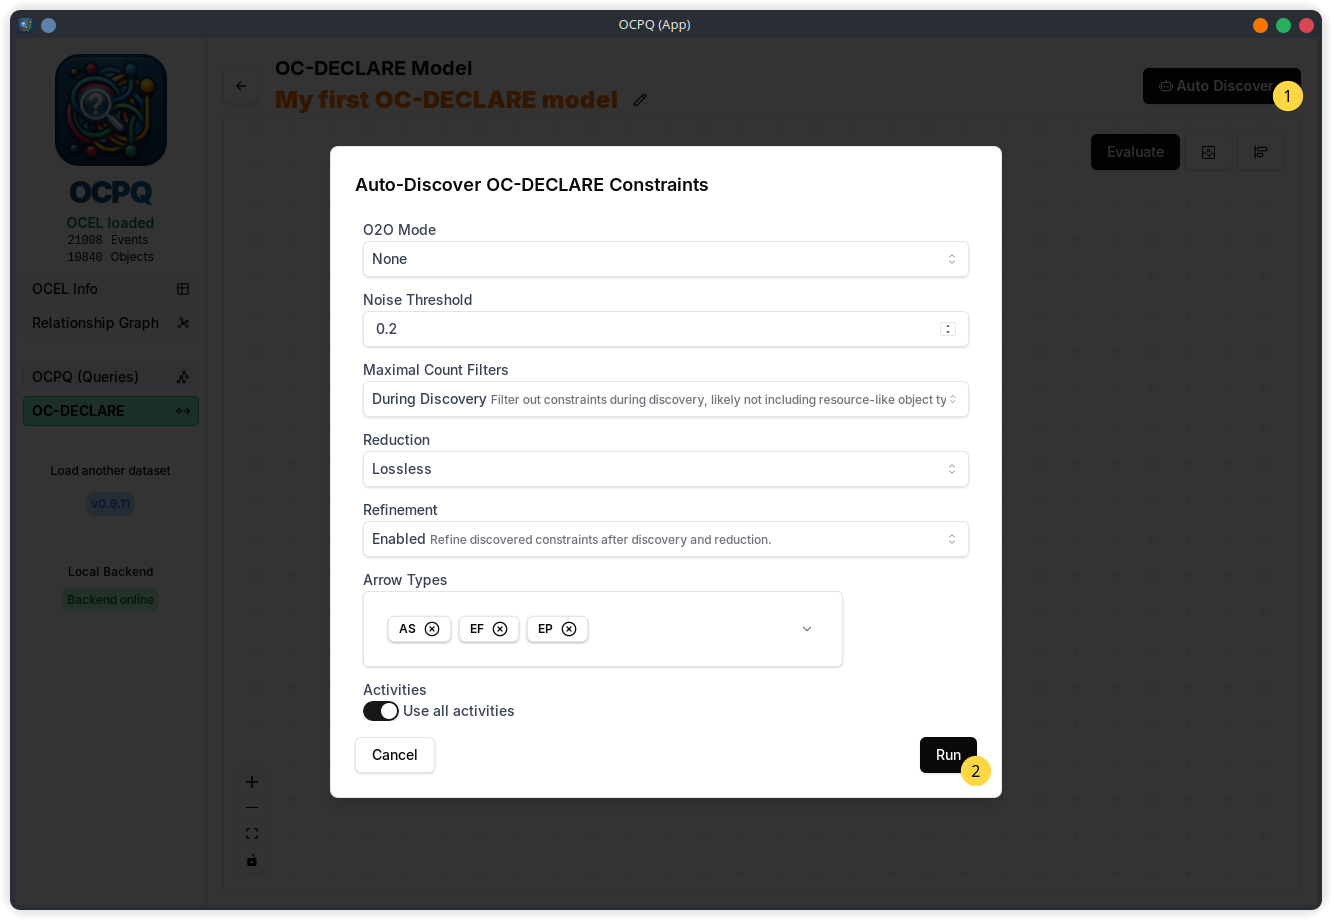
To automatically discover constraints from the loaded OCEL, click on the discovery button on the top right 1. In the opened dialog, you can select the discovery parameters, before clicking on the Run button 2.
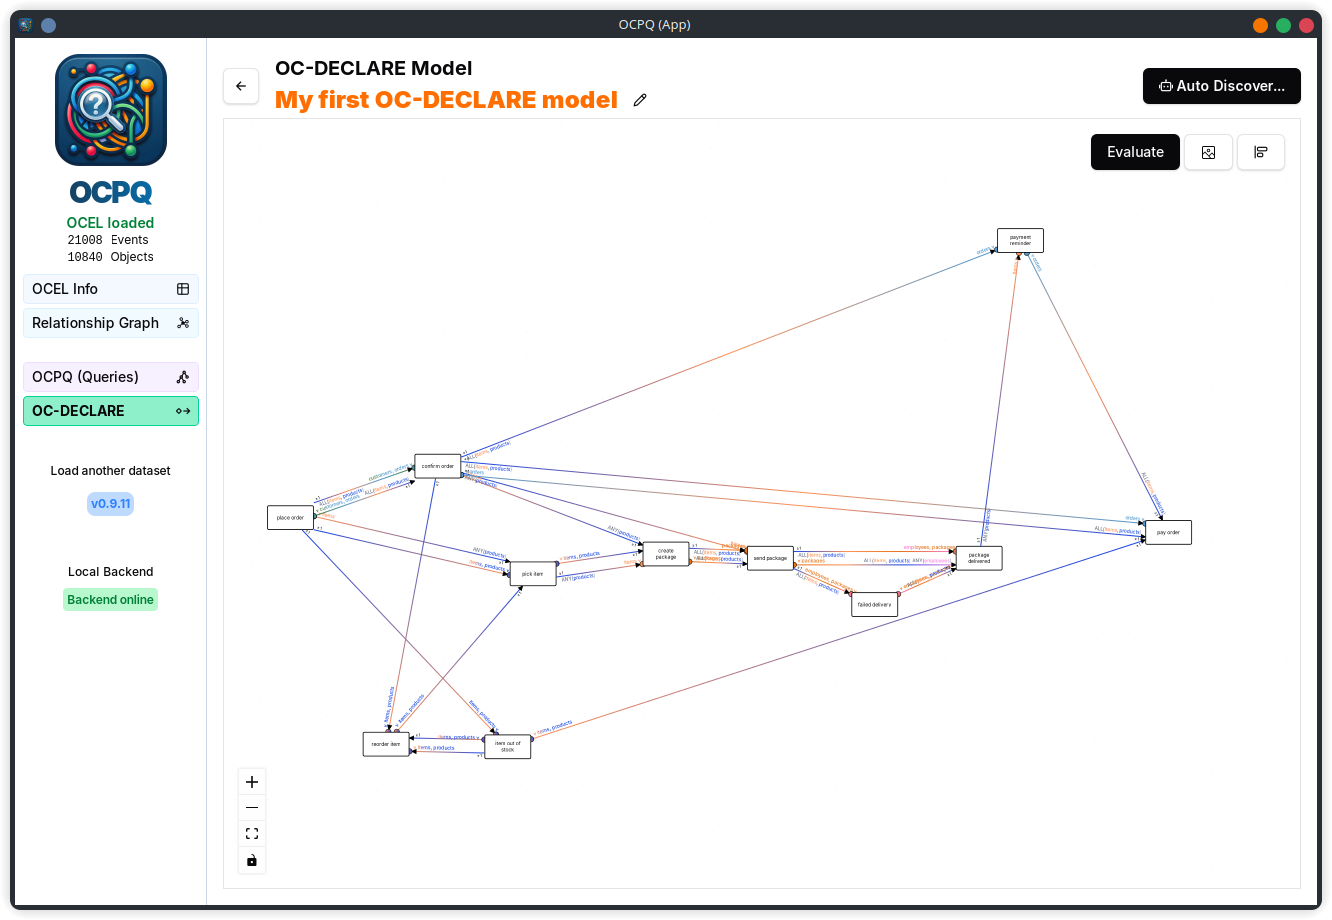
After the discovery is finished, the discovered constraints are added to the model view.